iBrew - First Photos
Moderator: Post Moderators
Re: iBrew - First Photos
Don't sell your other idea short of using a heat based starter like used in a clothes dryer. However, I have heard that those starters don't like being touched.

-
backyard brewer

- Posts: 3774
- Joined: Fri Feb 18, 2005 5:38 pm
- Location: Orange County, CA
- Contact:
Re: iBrew - First Photos
I ordered a hot surface controller and ignitor to play with. We'll see how it works. I guess they are like a bulb filament, don't like to be touched and they are fragile. So... I'll see. I found 3 Honeywell HSI controllers for $25 delivered and another $25 for an ignitor. I might try to contain it in a copper tube or something to protect it. Something that floods with gas when the valve opens and once ignited ignites the burner. My old BBQ had a 'collection cup' that the sparker was in.jward wrote:Don't sell your other idea short of using a heat based starter like used in a clothes dryer. However, I have heard that those starters don't like being touched.
 Become a Brewer's Hardware Fan on Facebook!
-
backyard brewer
- Posts: 3774
- Joined: Fri Feb 18, 2005 5:38 pm
- Location: Orange County, CA
- Contact:
Re: iBrew - First Photos
I received the hot surface control module and an ignitor today. I tested it just as an ignition control and it works great. There are a couple issues I'll need to accept and/or overcome. First I have to figure out how to mount the ignitor and protect it as much as possible. This is difficult because it needs to live in the flame in order to sense the flame presence. It looks more rugged than I thought it would, but they are supposed to be very fragile and crack easy.
The other issue that I'd like to overcome is the timing. The control module has a timed sequence that is preset. When it receives a signal it sends current to the ignitor but then waits about a full minute before it opens the gas valve. This is designed to give the ignitor plenty of time to get glowing hot before sending in the gas. As soon as it detects flame it cuts the current to the ignitor and continues to burn until the voltage is cut to it. The minute really seems like a long time. It could be just because I'm sitting there staring at it (it gets rather bright BTW).
I scored 3 identical control modules of eBay for only $5 each. I'll test one for a while and if all goes well, I plan on having all three burners controlled. The boil kettle won't have any logic, but it'll be nice having a burner on/off switch.
I haven't tried it with the Arduino but there is no reason it shouldn't work.

Re: iBrew - First Photos
Hey Derrin, if you thought the Sanguino was cool, you need to check out the Illuminato. 
http://antipastohw.blogspot.com/2009/01 ... -gpld.html
http://antipastohw.blogspot.com/2009/01 ... -gpld.html
Re: iBrew - First Photos
Oh man, I think I am going to have to jump on this bandwagon too...brahn wrote:Hey Derrin, if you thought the Sanguino was cool, you need to check out the Illuminato.
http://antipastohw.blogspot.com/2009/01 ... -gpld.html
-
backyard brewer
- Posts: 3774
- Joined: Fri Feb 18, 2005 5:38 pm
- Location: Orange County, CA
- Contact:
Re: iBrew - First Photos
Way ahead of you. You could be the slopiest coder in the World with that thing. 42 I/O pins is pretty incredible.
Another guy just started a group I joined on HBT about designing and building an "open source mash computer". It'll start out Arduino or Sanguino based and the idea is to make it so any non-coding type person that can solder can buy an Arduino(or Sanguino) , make or buy some sensors, make or buy a shield and download the open source code and have brewery automation.
Another guy just started a group I joined on HBT about designing and building an "open source mash computer". It'll start out Arduino or Sanguino based and the idea is to make it so any non-coding type person that can solder can buy an Arduino(or Sanguino) , make or buy some sensors, make or buy a shield and download the open source code and have brewery automation.
-
backyard brewer
- Posts: 3774
- Joined: Fri Feb 18, 2005 5:38 pm
- Location: Orange County, CA
- Contact:
Re: iBrew - First Photos
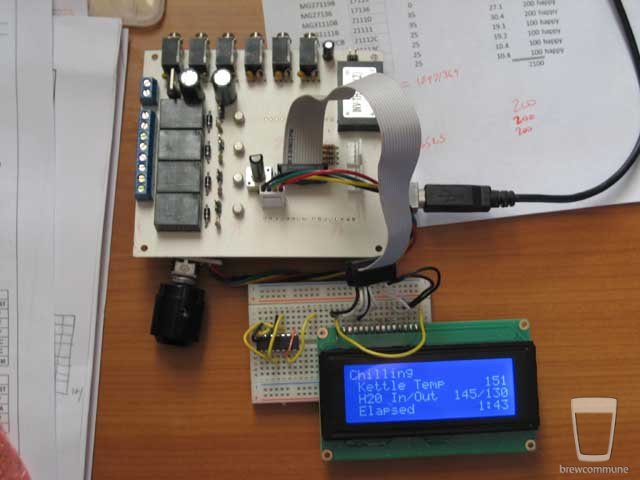
Boy this thing has really morphed into something different. The new version displays information organized by what you're doing. For example, before it would display all the information for the chillers, the boil kettle, the mash tun, etc. Now it displays by what you're doing; mashing, sparging, boiling or chilling. It also has 4 separate timers and I'm programming a hop schedule into the timers to let you know you need to add the next hops. I also got a pretty damn cool white on blue 20X4 LCD. I'm doing away with the LM34 temp sensors and going to the digital DS18B20s.
A couple of us started a group on HBT to design and build a stand alone brew computer, but we're still kinda debating platforms and such.
A couple of us started a group on HBT to design and build a stand alone brew computer, but we're still kinda debating platforms and such.

Re: iBrew - First Photos
We need to find you a king sized propeller hat Derrin.
Seriously though, that's awesome!
Seriously though, that's awesome!
New Brew Club, Free Photo hosting, Yeast Library, Forum-
brew captain

- Posts: 1158
- Joined: Sat Oct 01, 2005 8:41 am
Re: iBrew - First Photos
Yes Derrin, this is taking brewgeekdom to a whole new level!!!
Cheers!
Cheers!
Re: iBrew - First Photos
Very nice Derrin! Let me know if you end up making more of your own design, or if the group project gets off the ground and needs a beta tester. That looks like it would be a great upgrade for my 1.5 BBL setup.


-
backyard brewer
- Posts: 3774
- Joined: Fri Feb 18, 2005 5:38 pm
- Location: Orange County, CA
- Contact:
Re: iBrew - First Photos
I started back on this project a little and I was walking through ACE hardware when I walked past the metal section and I noticed they had SS tubing. I couldn't resist since I'm getting ready to make probes for the temp sensors on this. So, I bought some 1/4"OD X .028 wall SS tubing and 3/16" SS rod thinking I was going to TIG the rod into the tube to create a cap.
Turns out welding .028 wall tubing to 3/16" SS is quite a bitch. After burning up tubing and cutting a grinding a fresh end a few times, I finally figured out that forming the puddle on the rod and then using the torch to push it to the tubing got them to fuse nicely.
Here's the ends for the new probes:
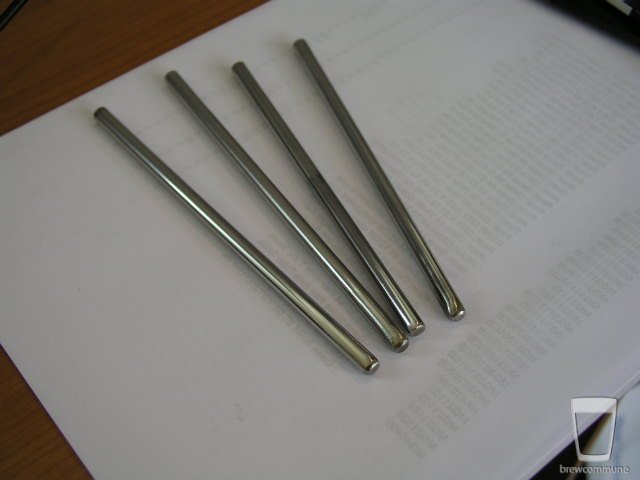
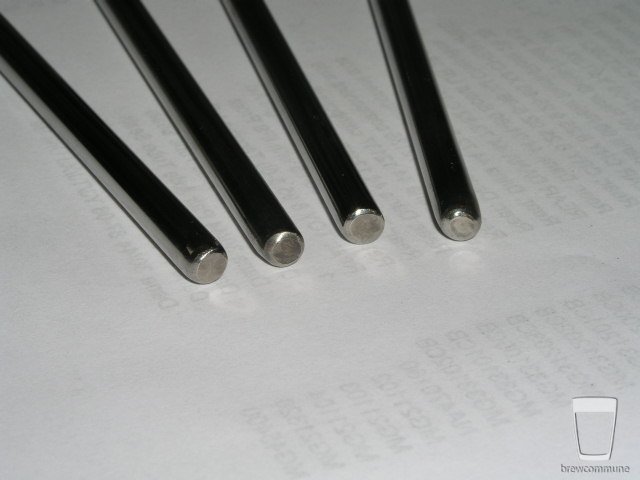